
ContentBuilder.js · Guide
Using ContentBuilder.js in a SvelteKit Project
ContentBuilder.js is a JavaScript library for creating elegant, editorial-style web content with simple drag and drop. In this guide we add it to a SvelteKit app. First we embed the editor, then we add saving, uploads and a page that shows the saved content to visitors.
ContentBuilder comes in two parts:
ContentBuilder
The editor, used on the page where content is created.
ContentBuilder Runtime
Renders the saved content on your site. It makes interactive blocks (sliders, counters, charts, accordions and more) work, both while editing and when viewing.
In this guide
- Set up the project
- Embed the editor and the runtime
- Add saving and uploads
- Show the content to visitors
- Try it
Step 1
Set up the project
Create a SvelteKit project and install ContentBuilder and the Runtime:
npx sv create my-app --template minimal --types ts --no-add-ons --install npm
cd my-app
npm install @innovastudio/contentbuilder @innovastudio/contentbuilder-runtime
The editor needs its assets (snippets, icons, fonts, plugins). They are in the ContentBuilder.js ZIP package, which you can download from your user area. Copy these into your project's static/ folder:
static/
├── assets/      # snippets, fonts, plugins
├── runtime/     # runtime files, used by the Live Preview page
└── preview.html # Live Preview page
Step 2
Embed the editor and the runtime
Create src/routes/edit/+page.svelte:
<script lang="ts">
    import { onMount } from 'svelte'

    // Editor
    import ContentBuilder from '@innovastudio/contentbuilder'
    import '@innovastudio/contentbuilder/public/contentbuilder/contentbuilder.css'

    // Runtime
    import ContentBuilderRuntime from '@innovastudio/contentbuilder-runtime'
    import '@innovastudio/contentbuilder-runtime/dist/contentbuilder-runtime.css'

    onMount(() => {
        // Create the editor on the .container element
        const builder = new ContentBuilder({
            container: '.container',
        })

        // Load the blocks users can drag in
        builder.loadSnippets('/assets/minimalist-blocks/content-plugins.js')

        // Load the content to edit
        builder.loadHtml(`
            <div class="row">
                <div class="column">
                    <h1>Hello World</h1>
                    <p>Start editing your content here.</p>
                </div>
            </div>`)

        // Start the runtime, so interactive blocks work while editing
        const runtime = new ContentBuilderRuntime({
            pluginFolder: window.location.origin + '/assets/plugins/',
        })
        runtime.init()

        // Make the runtime available to the editor
        ;(window as Window & { builderRuntime?: ContentBuilderRuntime }).builderRuntime = runtime

        return () => {
            builder.destroy()
            runtime.destroy()
            delete (window as Window & { builderRuntime?: ContentBuilderRuntime }).builderRuntime
        }
    })
</script>

<div class="container" style="max-width: 840px; margin: 140px auto; padding: 0 20px"></div>
The runtime makes interactive blocks (sliders, counters, charts, accordions and more) work while you edit. pluginFolder tells it where the plugins are. A plugin's files are loaded only when the content uses it.
The editor runs in the browser only, so turn off server rendering for this page. Create src/routes/edit/+page.ts:
export const ssr = falseRun it:
npm run devOpen http://localhost:5173/edit. You have a working editor: click the text to edit it, and drag blocks in from the panel on the right, including interactive ones like a countdown or a chart.
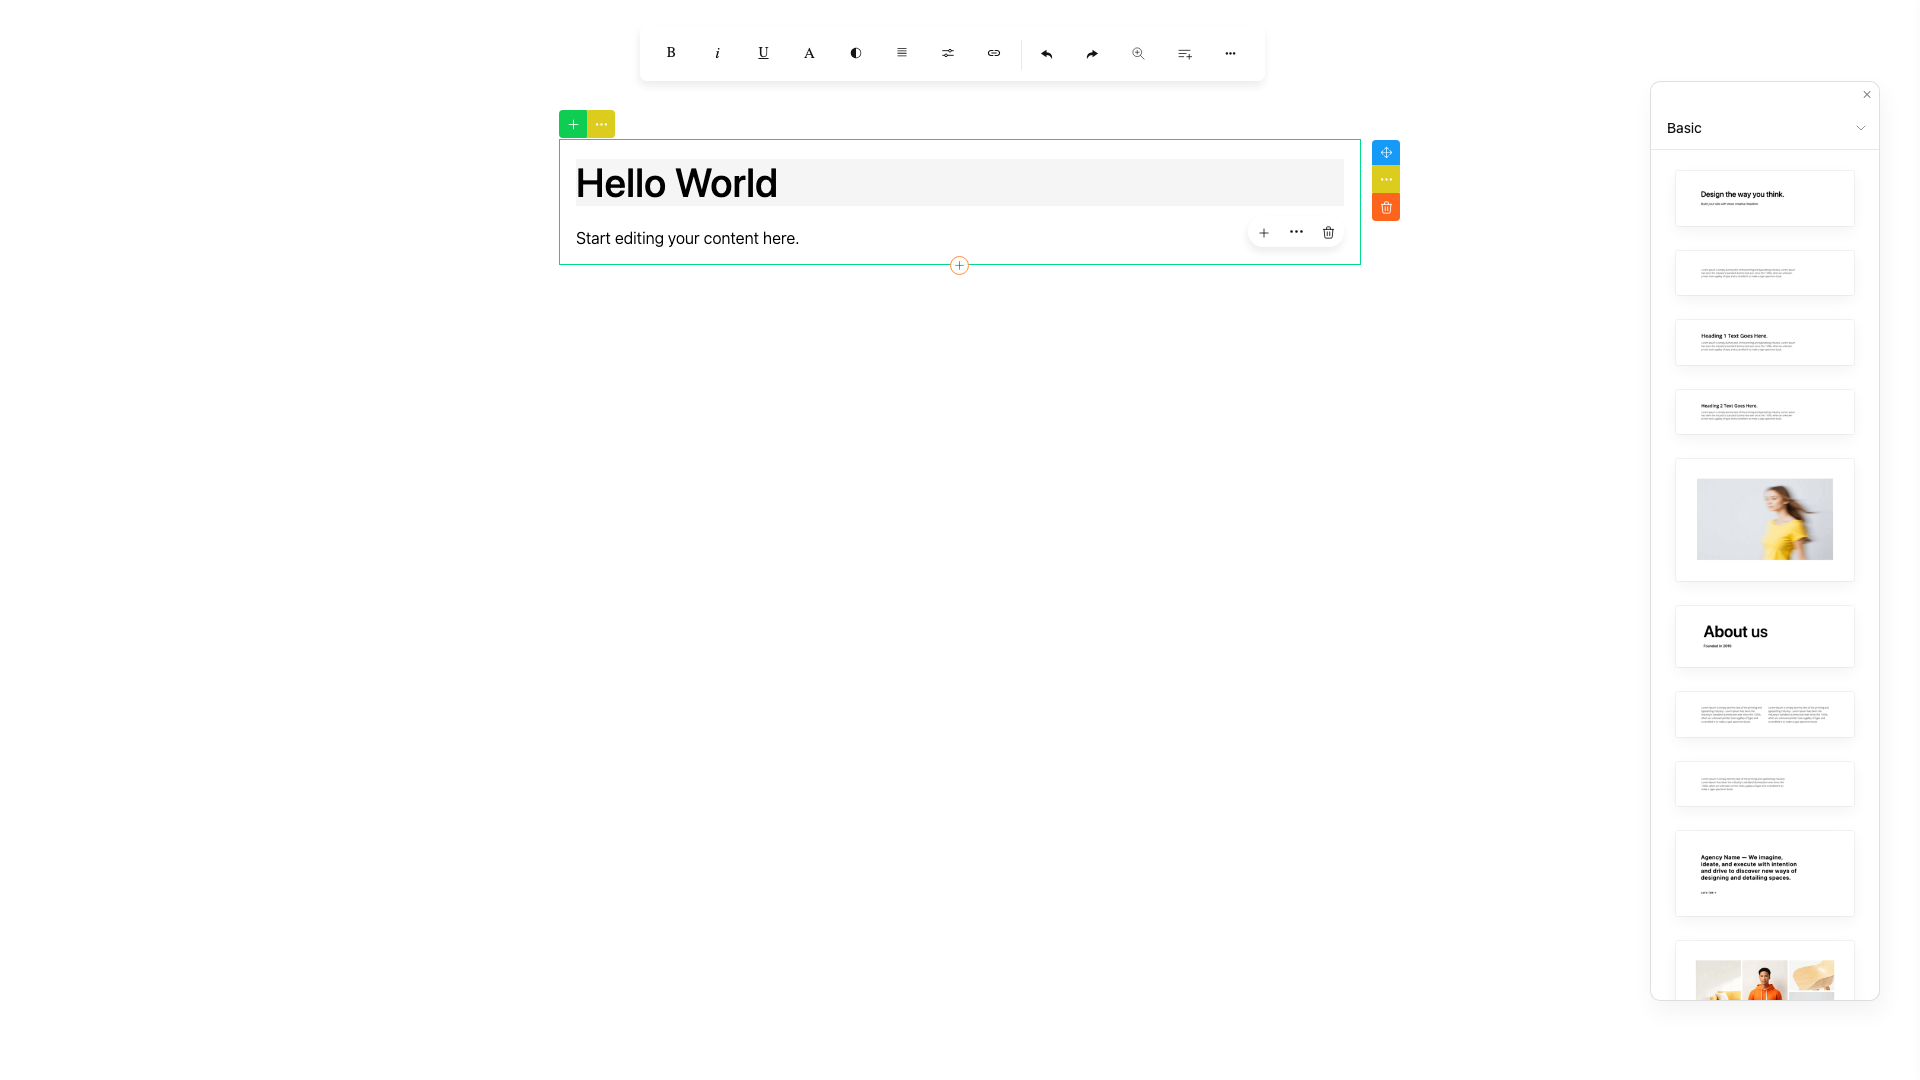
The editor after step 2. Click the text to edit it, and drag blocks in from the panel.
Step 3
Add saving and uploads
Now let's add saving and uploads. In this guide the content is kept in a JSON file, data/content.json, so you can run it without a database.
The server code uses Node's file functions. Install their types:
npm install -D @types/nodeCreate src/lib/server/content.ts, which reads and writes the content:
import { mkdir, readFile, writeFile } from 'fs/promises'

export async function loadContent(): Promise<string> {
    try {
        return JSON.parse(await readFile('data/content.json', 'utf8')).html
    } catch {
        return '' // nothing saved yet
    }
}

export async function saveContent(html: string) {
    await mkdir('data', { recursive: true })
    await writeFile('data/content.json', JSON.stringify({ html }))
}
Create the save route, src/routes/api/save/+server.ts:
import { json } from '@sveltejs/kit'
import { saveContent } from '#lib/server/content.ts'
import type { RequestHandler } from './$types'

export const POST: RequestHandler = async ({ request }) => {
    const { html } = await request.json()
    await saveContent(html)
    return json({ ok: true })
}
Create the upload route, src/routes/api/upload/+server.ts, and an empty static/uploads/ folder for the files:
import path from 'path'
import { writeFile } from 'fs/promises'
import { error, json } from '@sveltejs/kit'
import type { RequestHandler } from './$types'

export const POST: RequestHandler = async ({ request }) => {
    const file = (await request.formData()).get('file')
    if (!(file instanceof File)) error(400, 'No file received.')

    const filename = path.basename(file.name).replaceAll(' ', '_')
    await writeFile(path.join('static/uploads', filename), Buffer.from(await file.arrayBuffer()))

    return json({ url: '/uploads/' + filename }) // ContentBuilder needs { url }
}
The editor page gets the saved content from the server. Create src/routes/edit/+page.server.ts:
import { loadContent } from '#lib/server/content.ts'
import type { PageServerLoad } from './$types'

export const load: PageServerLoad = async () => {
    return { html: await loadContent() }
}
Then replace src/routes/edit/+page.svelte:
<script lang="ts">
    import { onMount } from 'svelte'
    import type { PageProps } from './$types'

    // Editor
    import ContentBuilder from '@innovastudio/contentbuilder'
    import '@innovastudio/contentbuilder/public/contentbuilder/contentbuilder.css'

    // Runtime
    import ContentBuilderRuntime from '@innovastudio/contentbuilder-runtime'
    import '@innovastudio/contentbuilder-runtime/dist/contentbuilder-runtime.css'

    let { data }: PageProps = $props()

    const DEFAULT_CONTENT = `
    <div class="row">
        <div class="column">
            <h1>Hello World</h1>
            <p>Start editing your content here.</p>
        </div>
    </div>`

    // Sends the file to the upload route, which returns { url }
    async function upload(file: File) {
        const formData = new FormData()
        formData.append('file', file)
        const response = await fetch('/api/upload', { method: 'POST', body: formData })
        return response.json()
    }

    let builder: ContentBuilder | null = null

    onMount(() => {
        // Create the editor
        builder = new ContentBuilder({
            container: '.container',
            previewURL: 'preview.html', // enables the Live Preview button
            upload,                     // handles image, video, audio and file uploads
        })

        // Load the blocks users can drag in
        builder.loadSnippets('/assets/minimalist-blocks/content-plugins.js')

        // Load saved content, or the default the first time
        builder.loadHtml(data.html || DEFAULT_CONTENT)

        // Start the runtime, so interactive blocks work while editing
        const runtime = new ContentBuilderRuntime({
            pluginFolder: window.location.origin + '/assets/plugins/',
        })
        runtime.init()

        // Make the runtime available to the editor
        ;(window as Window & { builderRuntime?: ContentBuilderRuntime }).builderRuntime = runtime

        return () => {
            builder?.destroy()
            builder = null
            runtime.destroy()
            delete (window as Window & { builderRuntime?: ContentBuilderRuntime }).builderRuntime
        }
    })

    // Sends the edited content to the save route
    async function save() {
        if (!builder) return
        await fetch('/api/save', {
            method: 'POST',
            headers: { 'Content-Type': 'application/json' },
            body: JSON.stringify({ html: builder.html() }),
        })
    }
</script>

<div class="container" style="max-width: 840px; margin: 140px auto; padding: 0 20px"></div>

<div style="position: fixed; top: 20px; right: 20px; display: flex; gap: 8px">
    <button onclick={() => builder?.viewHtml()}>HTML</button>
    <button onclick={async () => { await save(); window.open('/view', '_blank') }}>Preview</button>
    <button onclick={async () => { await save(); alert('Content saved!') }}>Save</button>
</div>
What's new
- Saving:
html()returns the edited content, which is sent to thesaveroute. The next time,+page.server.tsgets it from the server, andloadHtml()loads it into the editor. - Uploads:
uploadis one function for all media. It sends the file to theuploadroute, which returns{ url }. - Buttons: HTML opens the code view, Save saves, and Preview saves and opens the viewing page, which we add next.
- Live Preview:
previewURLadds a preview button to the editor, which usesstatic/preview.html.
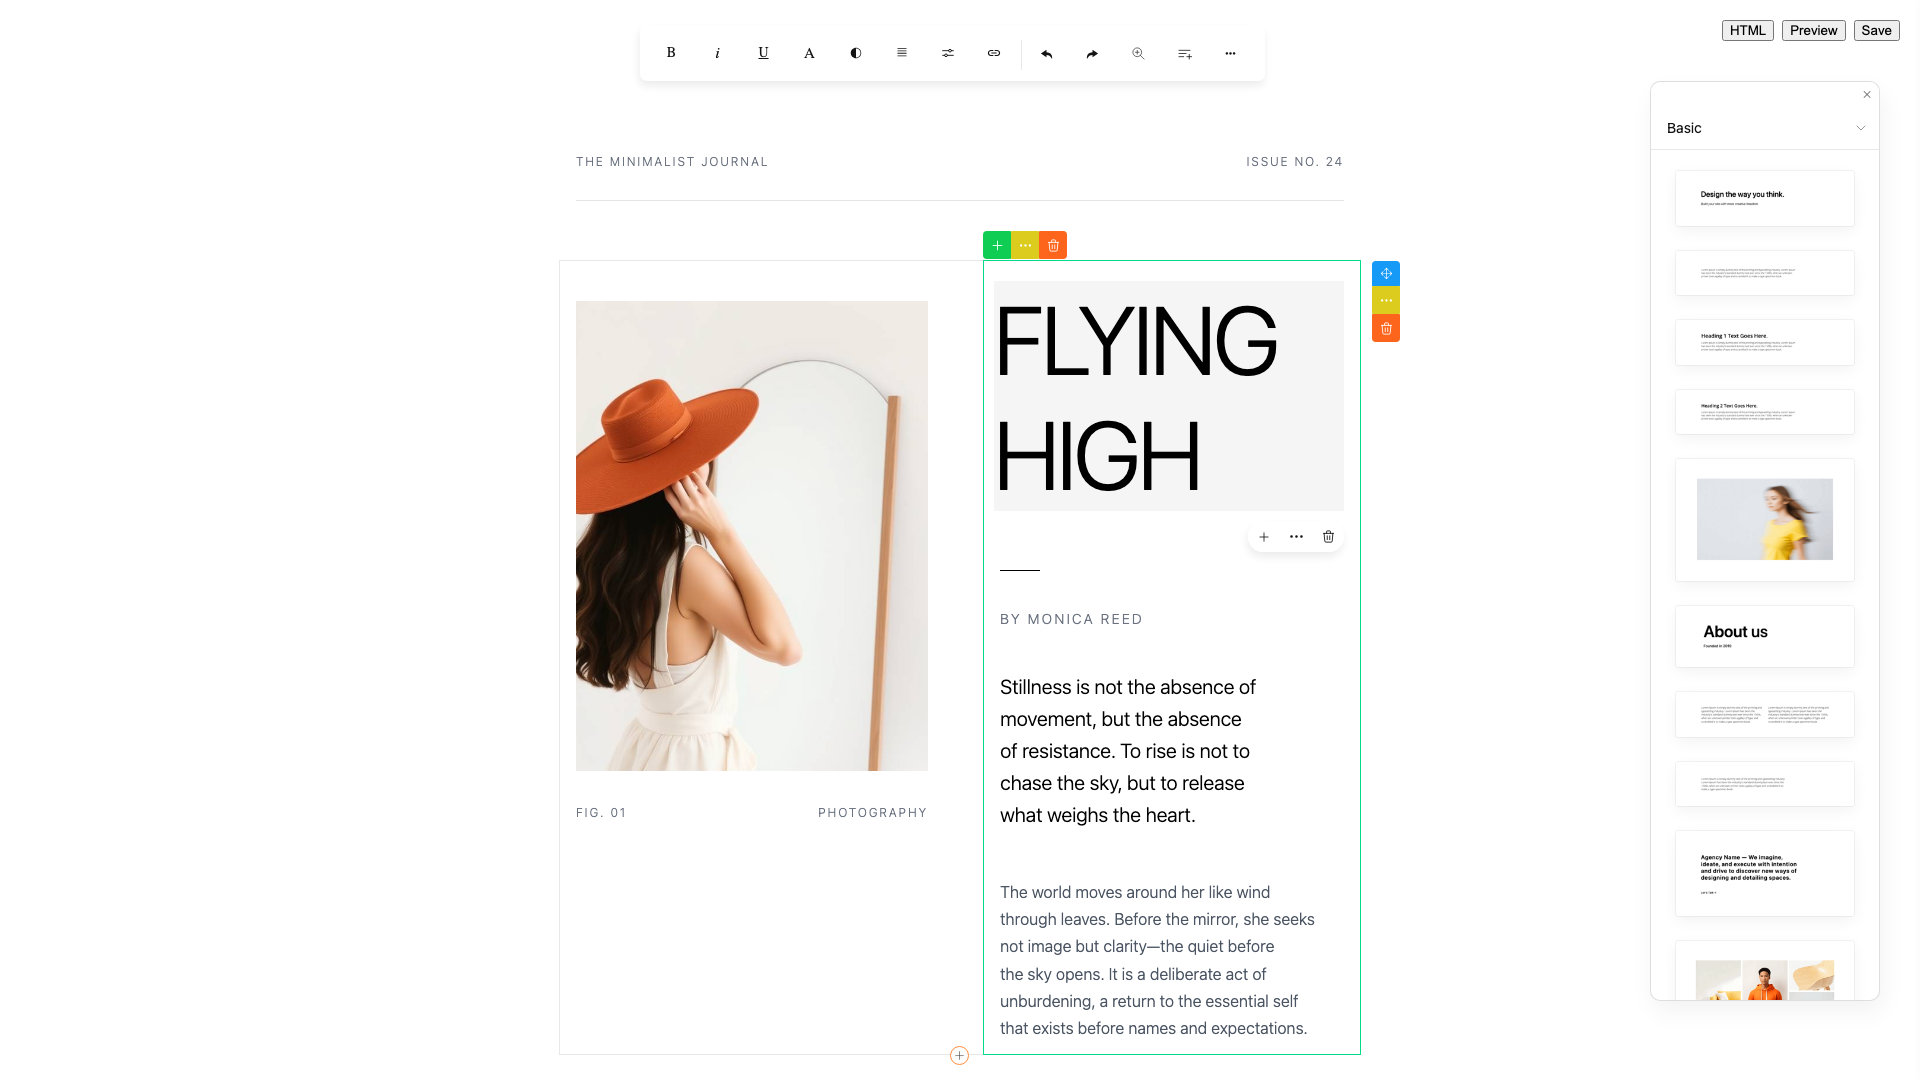
Saved content loads back into the editor the next time you open it.
Step 4
Show the content to visitors
The viewing page is rendered on the server, so the content is already in the HTML that browsers and search engines receive. This is good for SEO. The page needs only the runtime, not the editor.
Create src/routes/view/+page.server.ts:
import { loadContent } from '#lib/server/content.ts'
import type { PageServerLoad } from './$types'

export const load: PageServerLoad = async () => {
    return { html: await loadContent() }
}
Create src/routes/view/+page.svelte:
<script lang="ts">
    import { onMount } from 'svelte'
    import type { PageProps } from './$types'
    import ContentBuilderRuntime from '@innovastudio/contentbuilder-runtime'
    import '@innovastudio/contentbuilder-runtime/dist/contentbuilder-runtime.css'

    let { data }: PageProps = $props()

    // Activate interactive blocks in the content rendered by the server
    onMount(() => {
        const runtime = new ContentBuilderRuntime({
            pluginFolder: window.location.origin + '/assets/plugins/',
        })
        runtime.init()
        return () => runtime.destroy()
    })
</script>

<!-- is-container is required for content styling -->
<div class="is-container" style="max-width: 840px; margin: 80px auto; padding: 0 20px">
    {@html data.html || '<p>No content available.</p>'}
</div>
Important: the viewing container must have the is-container class.
Step 5
Try it
With npm run dev running, open http://localhost:5173/edit, drag in some blocks and click Save. Click Preview to see the saved content on the viewing page.

The viewing page, rendered on the server, shows the saved content to visitors.
Going to production
- Saving: replace the JSON file in
src/lib/server/content.tswith your database or CMS. - Uploads: send files to your storage (S3 or any other) and return
{ url }. Afternpm run build, SvelteKit serves only the files that were instatic/at build time, so new uploads saved there don't show. - Security: add authentication to the
saveanduploadroutes, so only your editors can save and upload.
Resources
- ContentBuilder.js innovastudio.com/contentbuilder
- Documentation on GitHub github.com/innovastudio-dev/contentbuilder
- In the package: the same documentation is in its
docs/folder (docs/README.mdto get started,docs/reference.mdfor all options)